
Working with Tracked Changes
When you receive a document that’s been edited, you’ll notice that Word’s “Track Changes” feature has been enabled to make it easier to keep track of what’s been changed. Here's how you can use Word’s review features to work with those changes.
Here’s how to get started.
Once the document is open, go to Word’s toolbar area and select the “Review” tab:

If you’re ready to go through the changes and you won’t be handing off the document to anyone else to make changes, turn off the “Track Changes” feature by clicking the “On/Off” switch next to “Track Changes” so that it’s in the “Off” position—that’ll prevent any additional changes you might make from being tracked:

Word gives you the choice of displaying your document in its original state (before any changes were made) or in its final state (with the changes ready to be accepted). If it may be of interest, you can use the “Tracking” pulldown to toggle between those:

But when you’re ready to review your document’s changes, make sure the “Tracking” mode is set to “Final Showing Markup”:

Here’s how you can accept or decline changes.
There are two ways you can accept or decline changes. You can use the “Accept” and “Reject” buttons in the toolbar, or you can use the buttons on top of the bubble surrounding each change. I’ll go over both options, and you can use whichever method you might prefer.
If you might like to use the “Next” and “Previous” buttons within the toolbar, you can kick things off by clicking the “Next” button to highlight the first change:

Then once a change is highlighted, you can either press “Accept” to confirm that change or “Reject” to decline it. (Either way, after you press “Accept” or “Reject,” Word will automatically highlight the next change.)

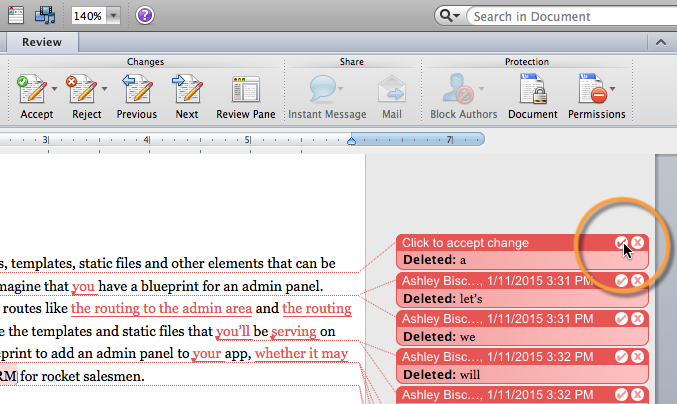
Or if you might prefer, you can also accept or decline changes through the buttons on top of the bubbles surrouding each change. You can click the “✓” button to confirm a change or the “✕” to decline it:
And here’s how you can go through the comments.
After you’ve gone through the changes, you may also find that there’re some comments in the margin. Once you’ve had a chance to read them and—if need be—act on them, you can delete them if you’d like.
Working with comments is very similar to working with changes. To select the first comment, press the “Next” button within the “Comments” section of the toolbar:

And from there, you can either press the “Delete” button to delete that comment…

…or you delete a comment by pressing the “✕” on top of the bubble surrounding the comment:

And that’s how you can review a document with tracked changes.
If you might have any questions, feel free to drop me a line.